User Accounts
- Authentication and authorization
- User attributes
- Account creation
- Login form
- Other self-service account features
- Activity logging
- Account administration
You were probably attracted to UserFrosting because you wanted to "make a site where users can sign in", or you already have a project in progress and your boss asked you to "put it behind a login," or you need to have some "protected pages." These are nontechnical terms. It will be easier for us to communicate if we first establish a common vocabulary, so that we can explain the concepts with more precision.
Authentication and authorization
The proper term for the process of "signing in" or "logging in" is authentication. When a user has successfully logged in, we say that they are an authenticated user.
As we've explained before, a web application is really a conversation between two agents with poor memory. When you have a feature or some part of your site that is only supposed to be accessible to authenticated users, the server needs to check that the client is who they say they are and that they've already successfully authenticated.
To do this, the client tells the server their identity (email or username) and their password, and in exchange the server associates that identity with their current session (since session data cannot be directly manipulated by the client, this is secure). This is the process of authentication.
When the server receives a subsequent request, it simply needs to check that the client's session is associated with a valid user identity. In UserFrosting, this can be easily handled by applying the AuthGuard middleware to the protected route:
use UserFrosting\Sprinkle\Account\Authenticate\AuthGuard;

// ...

$app->get('/account/settings', SettingsPageAction::class)->add(AuthGuard::class);
UserFrosting will throw an AuthGuardException if the client is not authenticated, or if their account has been disabled or deleted in the time since they were authenticated. This exception can then be caught by an exception handler to display an error page or perform some other appropriate action.
Of course, not all authenticated users should have the same permissions on your site. Determining whether a given authenticated user has permission to access a particular resource or perform a specific action is called authorization. Together with roles, permissions, and conditions, authorization constitutes UserFrosting's access control system. To learn more about UserFrosting's powerful access control features, see the next section.
User attributes
If you've already tried out the demo, you'll notice that user accounts come with a barebones set of attributes. These are stored directly in the users table, and accessed on an instance of the User model.
The user's email address is their primary identifier in your application. It can be used to sign in, reset a forgotten password, and perform account verification. You may prevent people from signing in with their email address by setting site.login.enable_email to false.
First and last name
By default, we require that the user at least specify their first name, but this can be overridden in your Sprinkle's request schema.
Username
We require a unique username because it is used to build "pretty URLs". For example, /users/u/david.attenborough/ would be the URL for the user david.attenborough's profile page. We realize that asking users to specify a username when they register is an additional barrier to use. For this reason, the registration page uses some client-side code to attempt to automatically generate a username for the user from their first and/or last names. If the user's desired username is already taken, they may manually specify a new one.
There is also a "suggest username" feature, that will use a built-in dictionary of adjectives and bird species to generate username suggestions if the user doesn't want to think of their own (private.sparrow, for example). We believe that coupled together, these two features will provide a smooth user experience for just about every potential new registrant.
Locale
UserFrosting supports a rich set of multi-language features. If your audience consists of users who speak different languages, they can set their locale so that they may interact with UserFrosting in the language of their choice.
Password
User passwords are salted and hashed using PHP's password_hash function and the CRYPT_BLOWFISH algorithm.
Account creation
UserFrosting comes with two built-in mechanisms for creating new accounts: public self-registration, and administrative creation.
Self-registration
In many instances, you will want people to be able to register for your website or application through a publicly accessible page. By default, the registration form is available at /account/register.
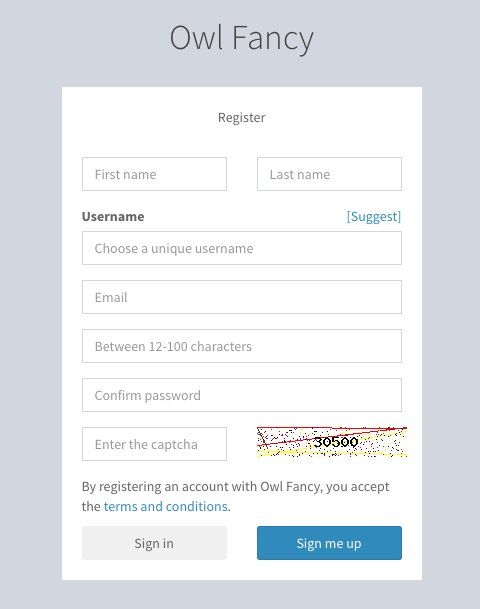
When the registration form is submitted, it will POST to the /account/register endpoint (which invokes the RegisterAction method).
Disabling registration
Public registration can be completely disabled by setting the config setting site.registration.enabled to false. When this is set, neither the registration page endpoint, nor the /account/register endpoint, will be accessible.
Security and spam mitigation
All publicly accessible forms are susceptible to spam. Some of this is "dumb" spam - that which comes from bots that crawl the web, looking for any form they can find and stuffing them with advertisements for Viagra. To mitigate this sort of spam, UserFrosting comes with two features:
- A honeypot field that is hidden from humans using CSS. The theory is that bots will fill it out (like any other field), and thus all you need to do after the form has been submitted is check if the field has a value. If it does, you know that a bot submitted the form and you reject the request.
- A simple captcha. In today's world of cloud computing and Mechanical Turk, even the most sophisticated captchas can be defeated by a determined attacker. However, captcha will still help thwart the majority of "dumb" attacks. To disable captcha, set the
site.registration.captchaconfig setting tofalse.
Of course, neither of these will protect you from malevolent targeted attacks. Fortunately, UserFrosting comes with a built in throttling ("rate-limiting") system, which gradually limits the number of times that a single IP address can submit your registration form. This will help to prevent large volumes of targeted spam, as well as account enumeration attacks (which could use the registration form to determine which usernames and email addresses have already been used).
Account verification
By default, new accounts must be verified through email before they can be used. This ensures that new accounts are associated with a reachable email address, and helps to limit the number of fake accounts that are created on your site. A token is sent to the registered email address in the form of a link (/account/verify, which invokes VerifyAction), and the account is activated when the user clicks the link.
To disable this behavior, set the site.registration.require_email_verification configuration setting to false.
Administrative creation
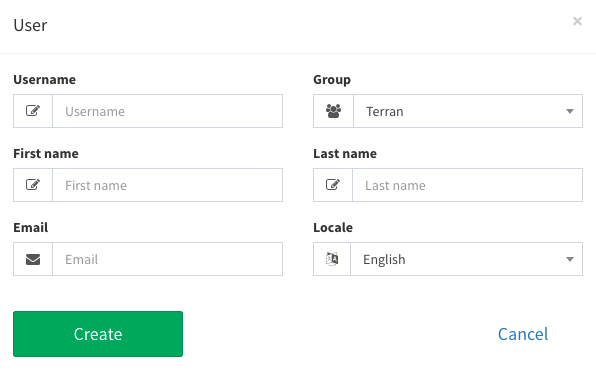
Sometimes, you want to have a site administrator create an account on behalf of a specific user. For some applications, you may want this to be the only way that new accounts can be created. To create a new user as an administrator, use the "create user" button at the bottom of the main user listing page:
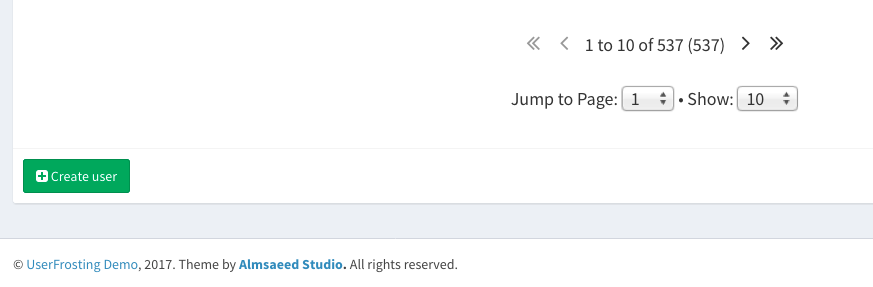
You can then fill out details for the user. After you create the user, an email will be automatically sent to them that allows them to set their own password.
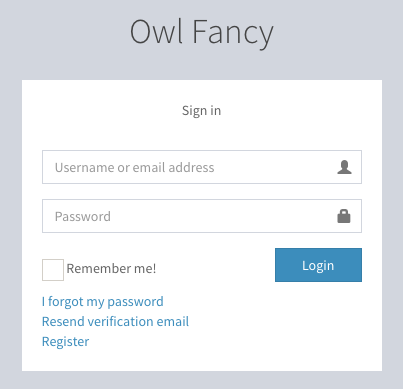
Login form
By default, the login form is available at /account/sign-in. The user provides their email or username as their identity, along with their password. The form is submitted to /account/login, which invokes LoginAction. This processes the authentication request.
The /account/login route is throttled via the throttles.sign_in_attempt throttle rule. This mitigates against the possibility of brute-force attempts to guess your users' passwords.
The sign-in form can automatically redirect users to a specific landing page after authentication via different mechanisms:
- By setting a
redirectquery parameter in the URL of the page that the form appears on, or; - By setting a
UF-Redirectheader in the response from the login submission route (/account/login).
The first method is typically used with users whose sessions have expired, to automatically redirect them to the last page they were on after they re-authenticate. For example, if a user was on /users when their session expired, the AuthExpiredExceptionHandler will take them to the URL /account/sign-in?redirect=users. This gives them the opportunity to sign in again, but this time it tells UF to automatically redirect to the /users page after successfully re-authenticating.
The second method is for "regular" sign-ins, to determine how to redirect the user based on some server-side criteria. This is used when you want different users to have different landing pages, depending on their roles and/or permissions. The LoginAction class will dispatch the UserRedirectedAfterLoginEvent event after the user has been successfully authenticated, which sets the UF-Redirect header in the response.
After the page containing the sign-in form receives a response from the server that authentication has succeeded, it will attempt to perform the redirect. The sign-in page JavaScript will first check for a redirect query string parameter. If none is present, it will check for the UF-Redirect header in the login response. It will then perform a redirect to the appropriate URL.
Tip
Checkout this recipe for an example on how to customize the post login destination.
Other self-service account features
Password reset requests
Users can reset their passwords by visiting /account/forgot-password. They will be asked for their account email address:
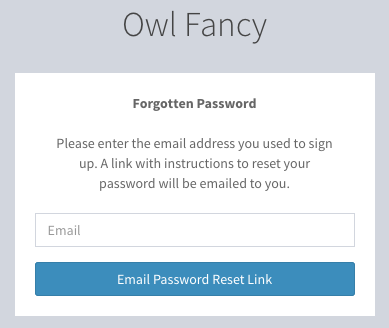
Upon submitting a password reset request, a secret token will be issued for the user's account (stored in password_resets table), and emailed to them in the form of a link (/account/set-password/confirm). The link will take them to a form with the secret token embedded in the page, where they can set their new password. The form is then submitted to /account/set-password, which updates the user's password and signs them in.
Password reset tokens expire after a period of time. This time can be specified, in seconds, in the password_reset.timeouts.reset config setting. It defaults to 10800 seconds (3 hours).
Password reset requests are throttled to prevent abuse. This throttle is specified in the throttles.password_reset_request configuration setting.
Resend account verification email
Sometimes, a user registers but then loses the verification email or fails to verify their account before the token expires. A new verification email can be requested at /account/resend-verification. This sends a fresh verification token to the specified address, if it is associated with an unverified account.
Verification requests expire after a period of time specified in verification.timeout. The default is 10800 seconds (3 hours).
For the precise implementation of the password reset and account verification resend features, see the UserFrosting\Sprinkle\Account\Controller\ namespace in the Account sprinkle.
Account settings and profile page
Users can update certain attributes of their accounts through the account settings/profile page. By default, this is available at /account/settings:
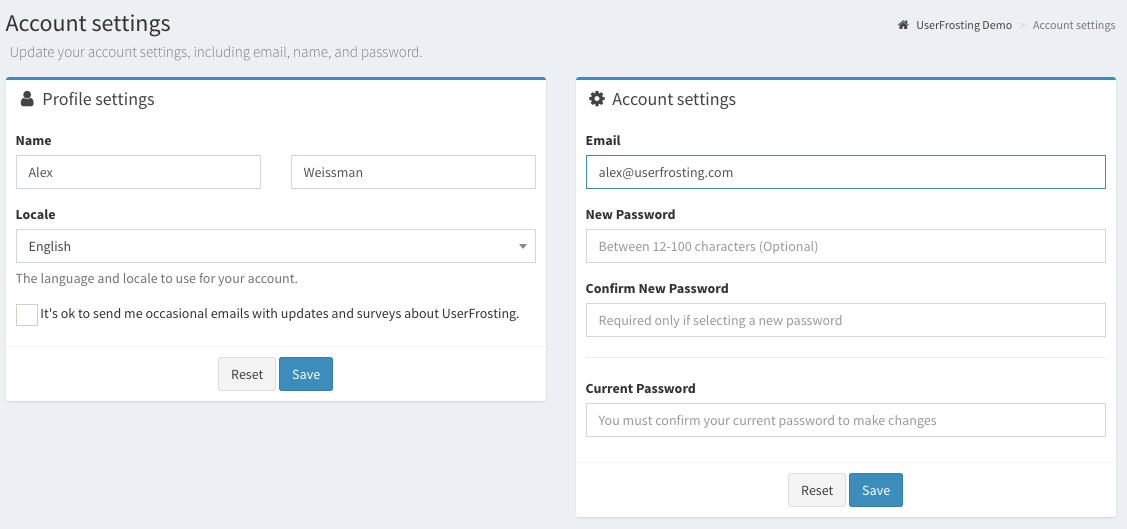
As a security measure, users are required to verify their current password before they can update their email address or password. Other fields, like name and locale, do not require the authenticated user to re-enter their password.
The settings and profile forms are posted to the /account/settings or /account/settings/profile endpoints (SettingsAction and ProfileAction methods).
Account avatar
Account avatars are currently handled via Gravatar. To set this up, users need to create an account with Gravatar and associate
their account email address with an avatar of their choice. UserFrosting will automatically generate a URL for the registered Gravatar image, which can be accessed via the $user->avatar property.
Built-in avatar uploading is not yet implemented.
Activity logging
User activities are automatically logged via the UserFrosting\Sprinkle\Account\Log\UserActivityLogger service. By default, they are logged to the activities table.
Many of UserFrosting's built-in routes already log activities like sign-in/sign-out, registration, account settings updates, and administrative activities for you. For example, the "update profile" event is logged via:
// Inject UserActivityLogger into $logger property.
$this->logger->info("User {$currentUser->user_name} updated their profile settings.", [
    'type'    => 'update_profile_settings',
    'user_id' => $currentUser->id,
]);
Every logged event includes the user's id, IP address, timestamp, an event type (e.g., update_profile_settings), and a description of the event. You may add additional logging directly in your controllers, or you can attach them to Laravel model events so that they occur automatically when the model is created/saved/updated/deleted.
Account administration
Depending on the permissions you have assigned, users with the "Administrator" role may also be able to:
View a list of users
The user listing page is available at /admin/users. The actual table of users is implemented through a combination of the Vue.js frontend, which generates the page and table skeleton, and AJAX calls to the /api/users route, which fetches the actual data as a JSON object (UserFrosting\Sprinkle\Admin\Controller\User\UsersSprunjeAction). This allows the page to efficiently retrieve paginated, filtered, sorted results without needing to reload the page.
See Data Sprunjing for more details on how this works.
View a list of user activities
Just like the table of users, the table of user activities is generated through a combination of a table "skeleton" embedded in the page itself (/dashboard or /activities), and AJAX requests to the /api/activities route.
Edit user accounts
Basic user details (name, email, locale, group) can be modified via the "Edit user" option in the dropdown menu in the user table.
Set user roles
Roles can be added to or removed from a user account via the Manage roles button on the user's profile page, or in the dropdown menu in the user table.
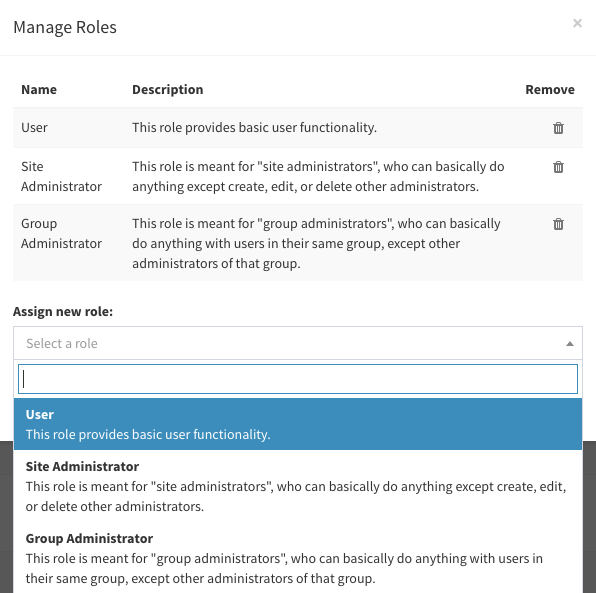
By default, only the root account can change users' roles. You may want to modify this to allow site admins to grant a subset of the available roles to other users - but be careful! You may not want site administrators to be allowed to elevate other users to site administrator, for example. See the section on access control for more information.
Reset a user's password
Administrators may be able to perform a password reset on behalf of users. This is useful, for example, when you have users who have difficulty with the self-service password reset tool. Password resets can be performed via the "Password" button in the user's profile page, or the "change password" option in the dropdown menu of the user table.
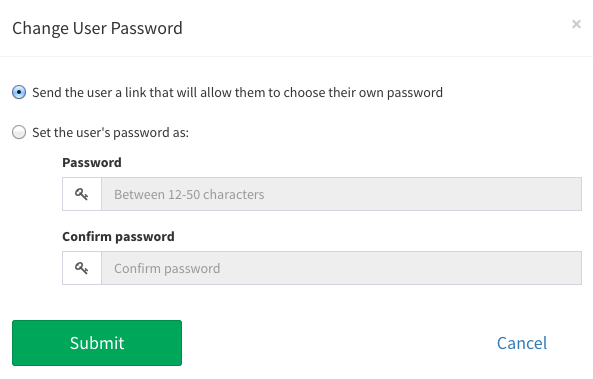
You may send a password reset link to the user so that they can change it themselves, or even set a password directly when dealing with particularly technology-adverse users over the phone.
Disable/enable accounts
Sometimes, you need to disable a user's account. For example, if the user's account has been compromised, or if they are causing some sort of problem on your site. When you choose the "disable user" option from the user's profile page, or from the user table dropdown menu, the flag_enabled value for the user will be set to false and the user will no longer be able to sign in. Any current sessions the user has will expire on their next request.
The administrator can later re-enable the account, if desired.
Delete accounts
User accounts can be deleted from the user profile page, or the user dropdown menu in the users table.
Deleting user accounts presents a problem because the user may have related data in the database that would become orphaned, potentially breaking other functionality in your site. For this reason, UserFrosting performs soft deletes by default. The user record is not actually deleted, but instead a deleted_at timestamp is added to the record and the user is no longer able to sign in. Deleted users are also excluded from all queries unless the withTrashed method is added to the Eloquent query. Related entities (activities, roles, etc) are left alone.
If you really want to completely remove the user from the database, you can call the User::forceDelete method in your controller logic.
Here's an example using User::forceDelete in a custom UserActions class:
<?php
use UserFrosting\Sprinkle\Account\Database\Models\User;

class UserActions {
    public function __construct() {}

    public function delete($userId) {
        $userModel = new User();

        //includes soft-deleted users
        $user = $userModel->withTrashed()->find($userId);

        if(!$user) return;
        $user->forceDelete();
    }
}